How to Frame a Mirror with Wood, a DIY Mirror Frame
The links in this post may be affiliate links. That means that if you click them and make a purchase, this site makes a commission. It will have no impact on the price you pay or the experience of your purchase.
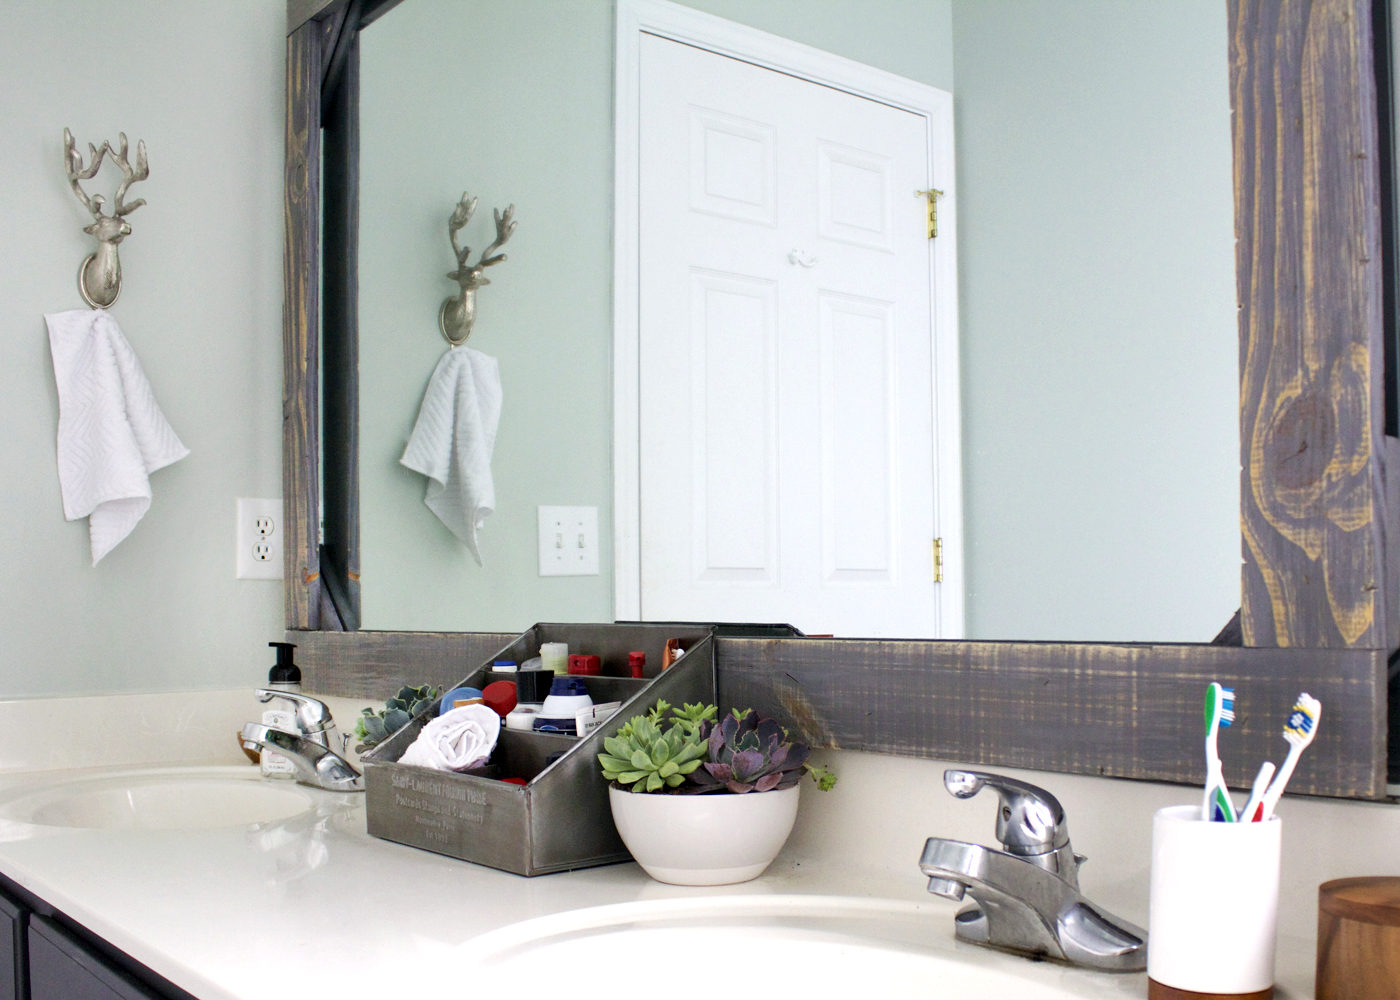
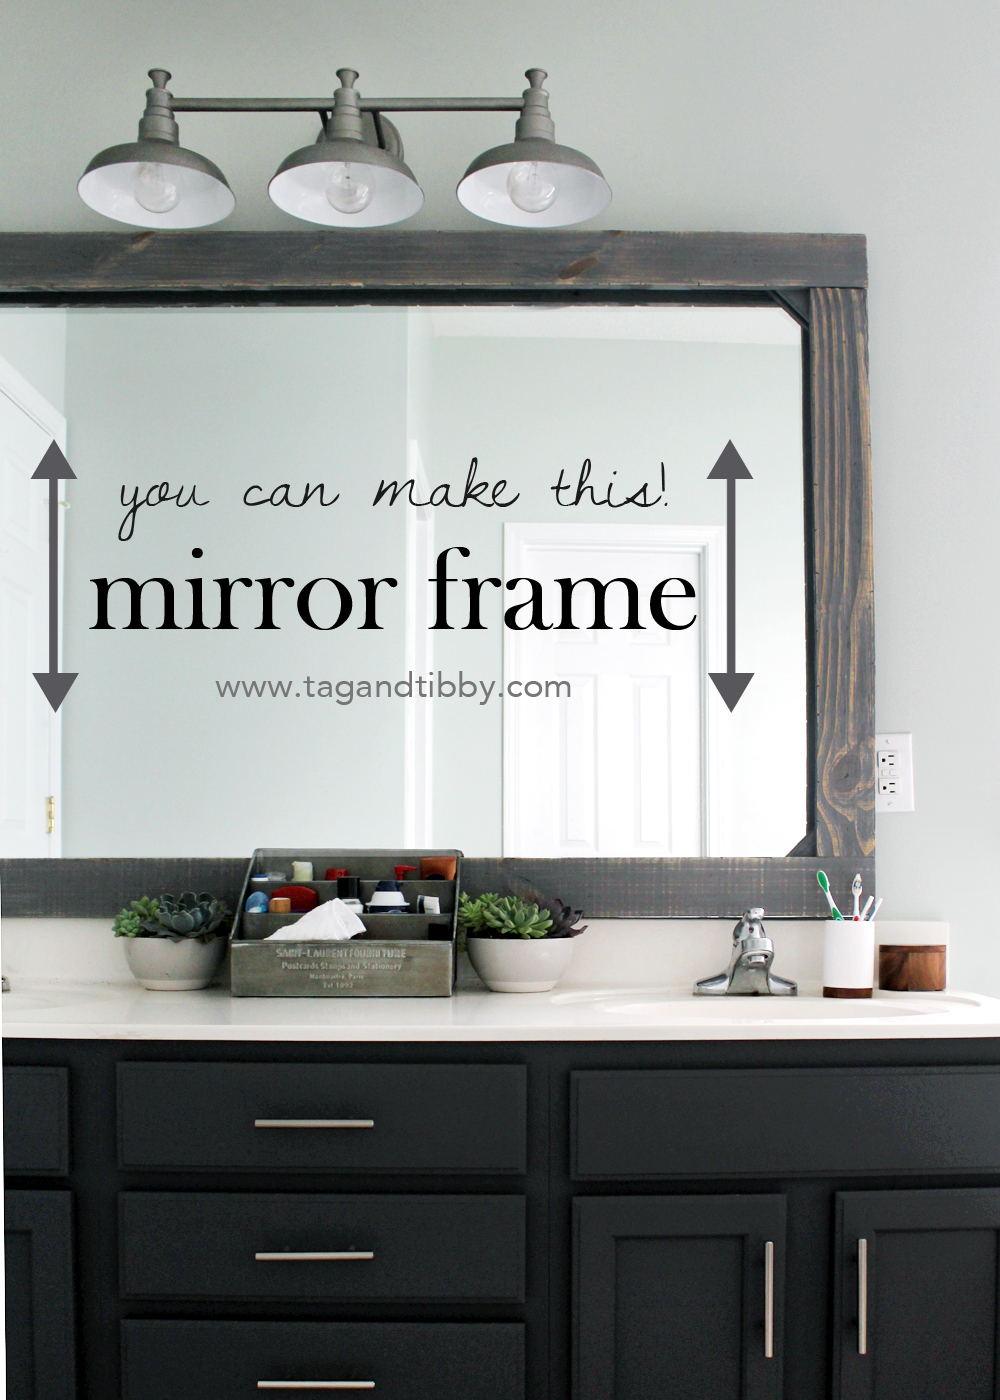
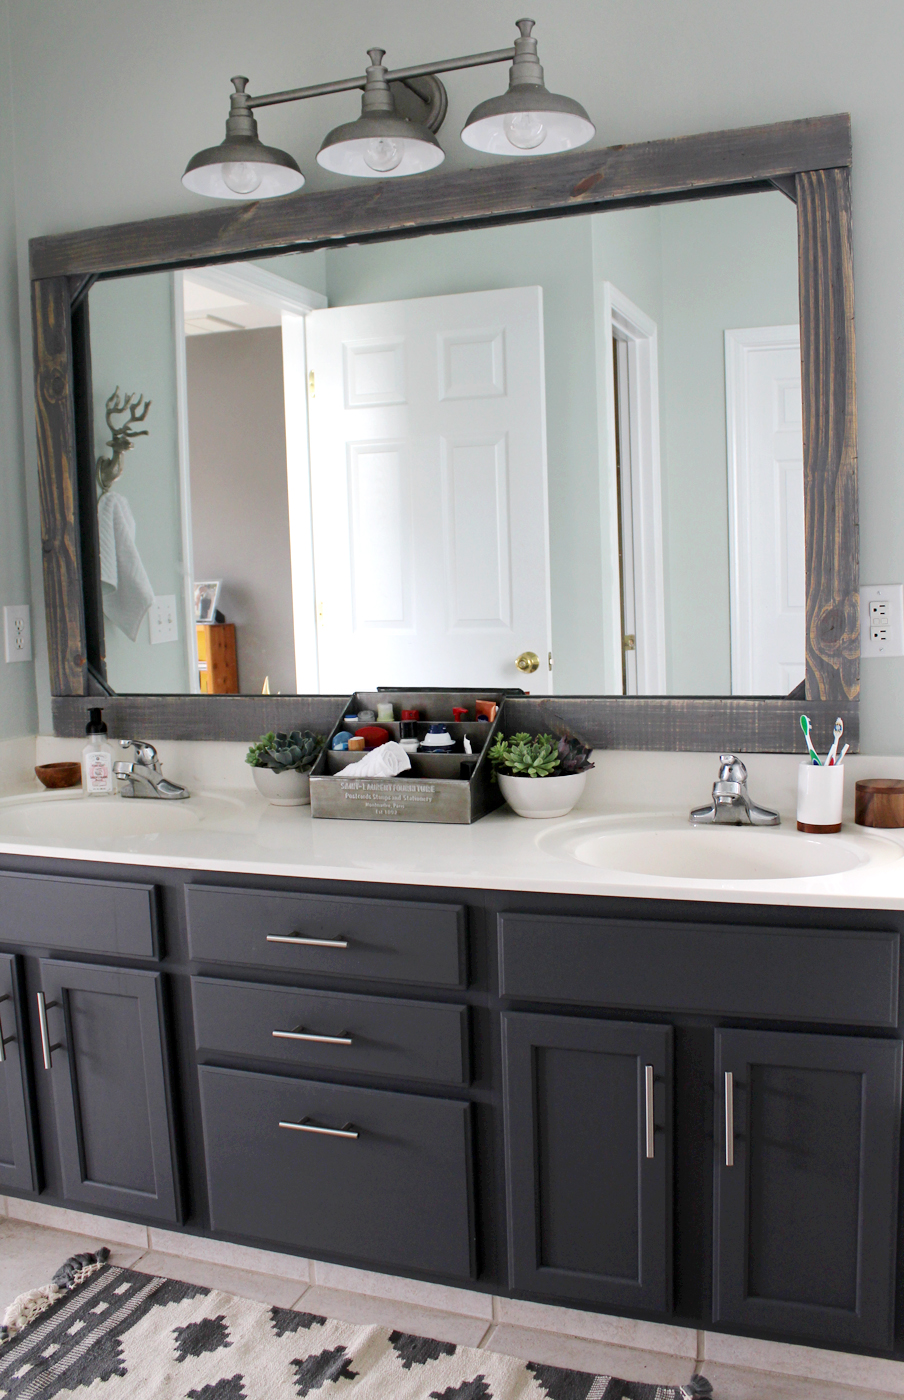
We recently built a rustic mirror frame to go around our existing primary bathroom mirror. The wood frame is made from pine boards. I stained the frame Rustic Gray and roughed it up a bit with a sanding block, nails, and a rough gloss treatment. Scroll down for a supply list, an illustration overview, and process pictures for how frame a mirror!
Our frame size ended up being 66″ x 42.” I give dimensions as a guideline below, but please measure your own mirror and adjust your measurements accordingly!

This article contains affiliate links, you can read my full disclosure here.
Rustic Mirror Frame, How to Frame a Mirror
Supplies
Basic pine boards (1″x4″)::
-Cut 2 boards 66″ long
-Cut 2 boards 35″ long.
-Cut 4 pieces at 45 degrees, about 12″ long
*measurements for our mirror to be used as a general guideline. Please measure your mirror and adjust measurements accordingly!
1.25″ wood screws
2 L-angle Joist Hangers (similar here)
Sherwin-Williams Wood Classic Oil Stain (Rustic Gray, 1 quart)
Hammer and nail
Minwax Polycrylic Protective Finish, 1 quart and brush
Water-Resistant Command Strips
Step 1: Build the frame rough sides of wood out (will look more rustic). Use 4 wood screws per corner.
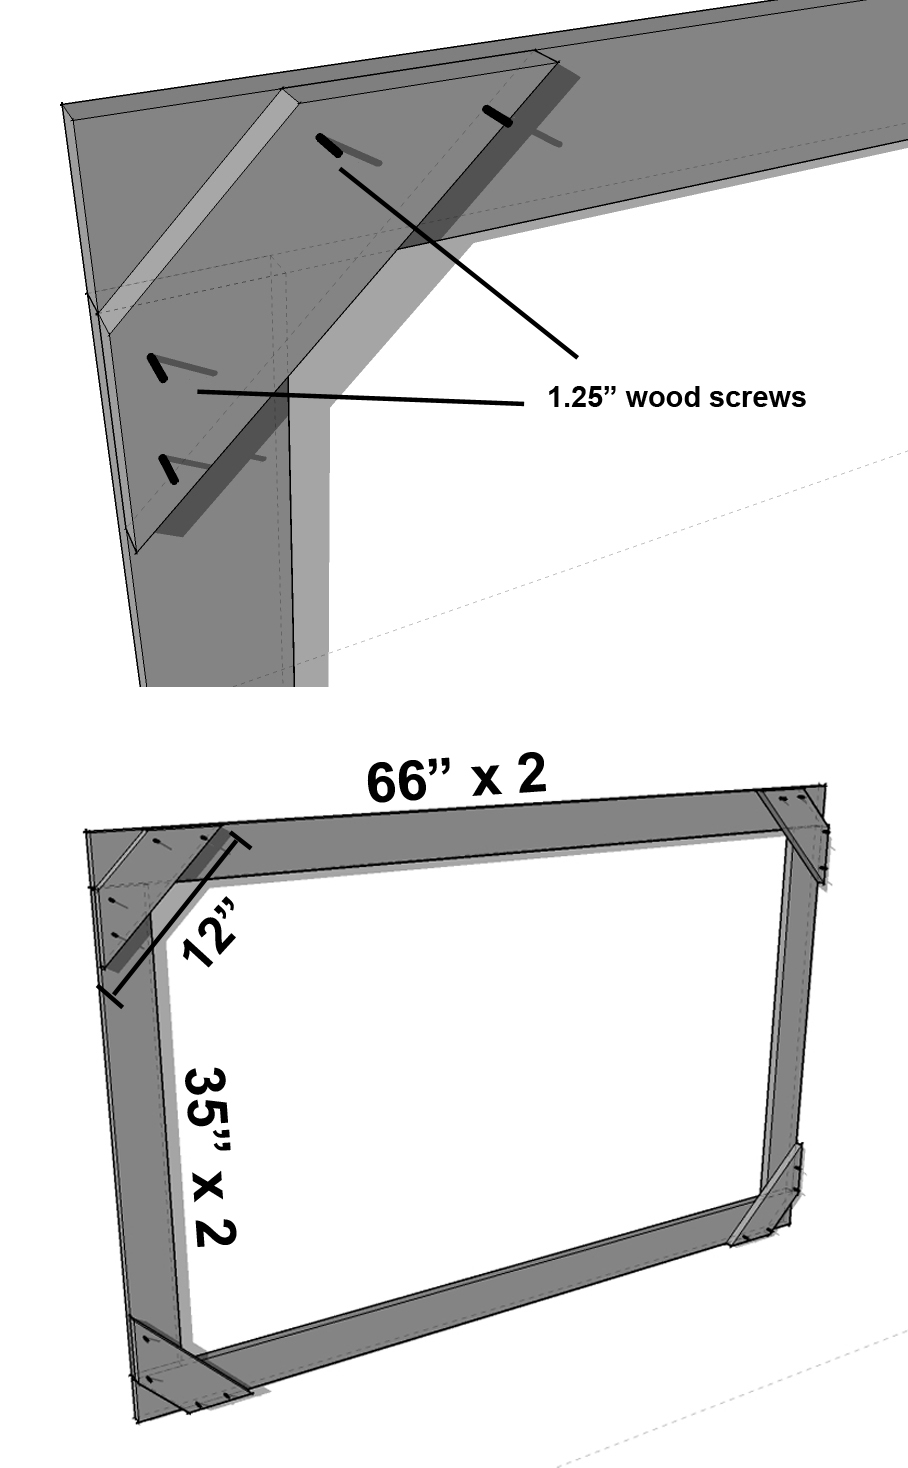
Step 2: Test the wood structure to make sure measurements are correct (optional but recommended!).

Step 3: Stain the frame according to stain directions. Dry, then sand with sanding block to show woodgrain.

Step 4: Carefully hammer the edge of a nail into the frame to add weathered, rustic look.

Step 5: Brush on a clear coat of protective finish with a rough brush to add texture.

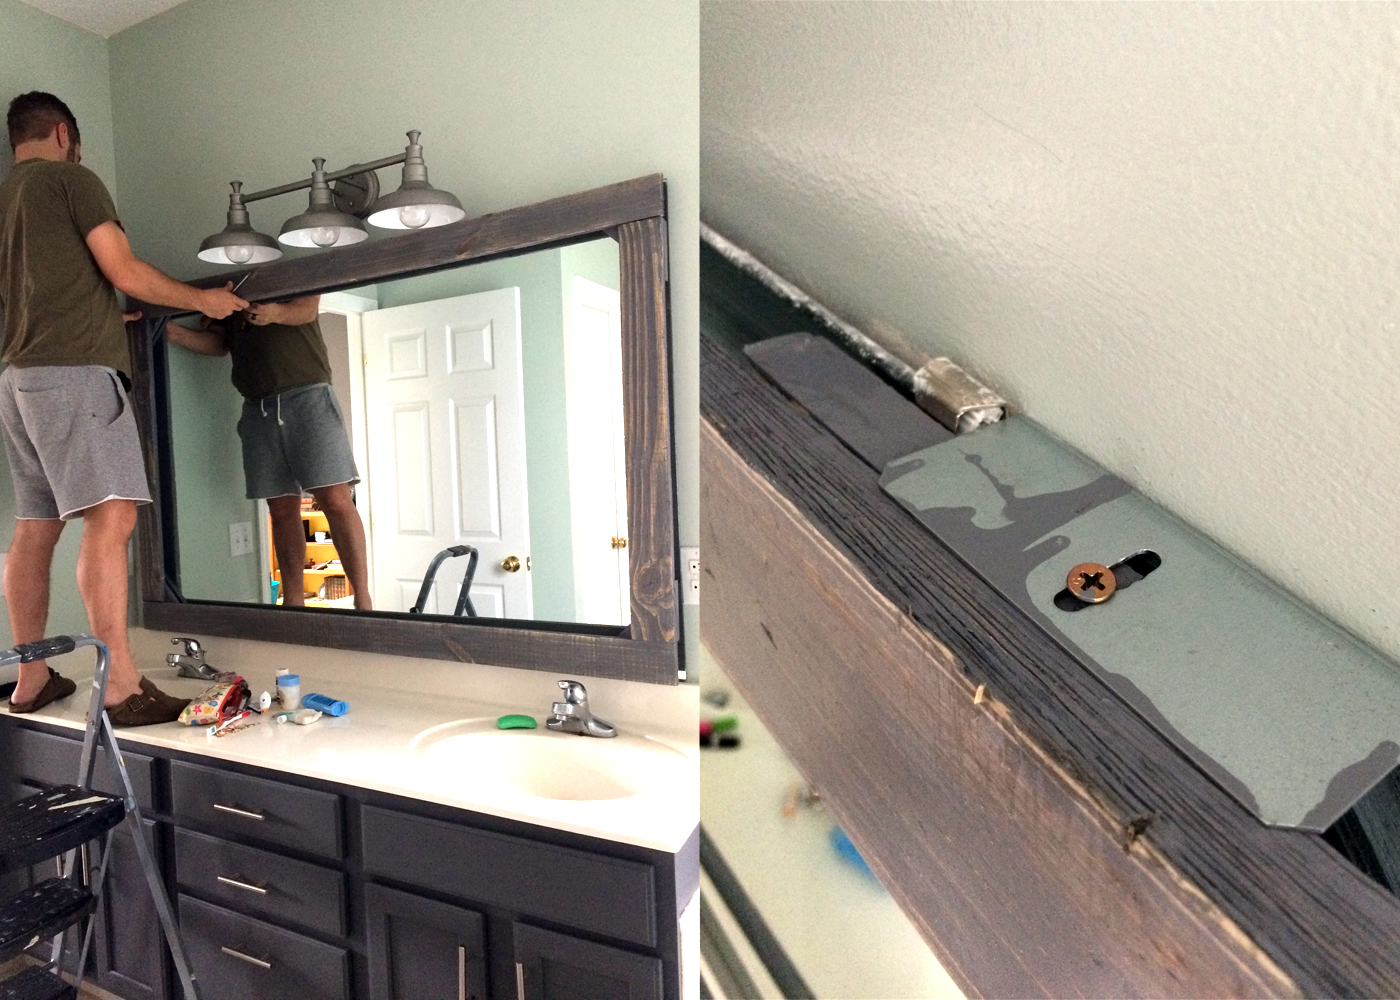
Step 6: Attach 2 L-angle joist hangers to top of wood frame (near mirror hooks) and slide joist hanger behind mirror.
On bottom two corners apply command strips so wood frame is flush to mirror.
Stand back and enjoy your new custom wood mirror!
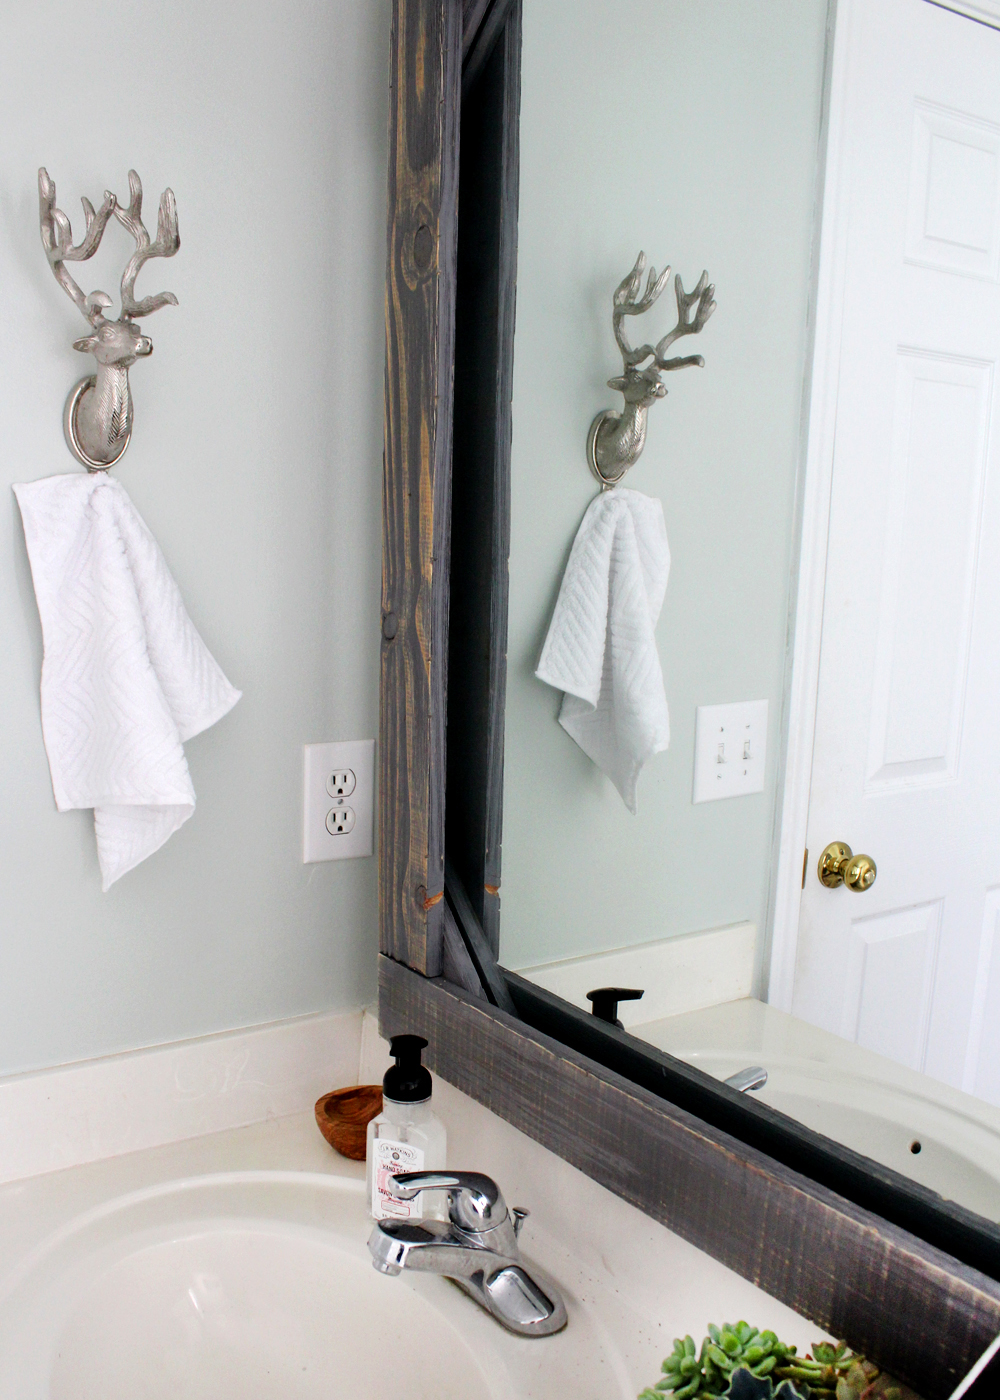
This DIY mirror frame was much less expensive than replacing our large existing mirror. And you can easily customize the look with your choice in stain. It was a rewarding DIY project and we are really happy with how the rustic frame turned out!
Check out the full master bathroom reveal here!
For another mirror frame tutorial, check out my friend Melissa’s framed floor mirror DIY with how to video!
Pin for Later:







Where did you get the rug?
Homegoods!
When it comes to the Minwax Polycrylic Protective Finish, did you use the matte, semi gloss, or gloss finish? I didnt see it mentioned and I can’t tell by the pics. C ant wait to get started on this! Thanks!
My quart is "Clear Matte" but I couldn’t find a comparable online so I linked to Clear Satin. Should be similar!
I’m sorry I totally missed the link! That’s good news since I guessed right and bought the matte yesterday…. Thanks for the reply!
This turned out beautiful! And just curious where you got the antler towel holder?
Thank you! I purchased the antler towel hook at Homegoods.
What color are your cabinets?
They are Sherwin Williams Peppercorn, you can read the article with paint details here: https://www.tagandtibby.com/blog/2017/1/23/300-master-bathroom-remodel
Great little “show and tell” project…. however, I am lost…. how did you secure the mirror to the frame????
I have a mirror that is 72”W x 54”H and I plan on replicating this frame-idea and putting it in our master bedroom.
I will sand the frame first, however. I find that “wood grain” comes out better for Me when I use a small electric power sander with Grit 60 then a Grit 120.
I will use a Minwax Mahogany Red stain, and a combination of an outdoor Gloss weather proof Varnish and a layer of semi-satin Polyurethane.
I also have a “smaller” bathroom mirror that is 30”W x 30”H that I will use this frame project on. Hopefully how you secure the mirror to the frame is plenty secure, I’d hate to have it slip.
What worked for us was shared here: "Step 6: Attach 2 L-angle joist hangers to top of wood frame (near mirror hooks) and slide joist hanger behind mirror." The frame is not heavy, and since the mirror was already safely secured to the wall this method worked great. But I’m sure there are other methods out there too, best of luck!
I had the same question, about attaching the frame to the mirror not the frame to the wall. So your mirror was still attached to the wall independently? Any tips if it is not still attached to the wall. Also, did you frame it slightly bigger than the mirror so there was not an obvious gap between along the edges?
I do not have experience mounting frameless mirrors but I’m sure there are good tutorials available! We did not remove our original mirror.
Our frame is the same size at the mirror because of our surrounding outlets (it covers but does not extend past the mirror edge). This design does show a gap (the 9th image shows it pretty well) but it doesn’t bother us.
If my mirror is glued to the wall, is it possible to use something else besides the L-shaped hangers? I guess doesn’t suggest how the hanger was attached to wall before attaching to frame. Thanks for your help. It looks great what you did.
Some other tutorials suggest gluing the frame directly to the mirror or even command strips (like this one: https://www.hgtv.com/design/rooms/bathrooms/how-to-frame-a-plate-glass-wall-mirror) Hope that helps!
Julia – My mirror is glued to the wall as well. Do you need to have a space between the mirror and the wall for these “L angle joist holders” to work? Was your mirror hung w like picture hanger type hangers? Mine is wall to wall and glued on. So there isn’t any Spence between the two. Wondering if just gluing the wood to the mirror would be my option. I’ve done the walls and vanitiy the same as you and they look awesome so far! Mirror is my last step!!
Hi! There was a bit of space between our mirror and the wall. I have seen bloggers use glue/3M type products with frames. I was just be sure to pick a glue that could hold the weight of the frame. Hope that helps!!
Mine works too. I used woodprix plans and build it without any problems.
Thanks so much for posting this mirror frame article! My husband and I did one for two bathrooms in our house. They turned out amazing. I can’t believe how much they changed the room.
I am so glad they turned out well! I want to build one for our kids’ bathroom next. They give the bathroom more personality!
Question 🙂 did you do the 45 degree cut just for looks? I’m thinking if I didn’t do that the frame would sit more flush against the wall?
My husband says that the 45 degree pieces are support for the overall frame structure. Hope that helps!
Awesome project! We will try it this weekend! Would you mind sharing the wall color paint? Thank you so much!
Awesome! Our walls are painted the color Sherwin-Williams Sea Salt.
Hi! I love everything! Great job. I’m curious about where you used the command strips. On the mirror, frame, or both? And where? Thanks for the post.
The bottom of the frame along the short wood angle pieces to the mirror (where it touches). I’ll try to find a picture and update the article to explain it better!
Lovely and informative post… Thanks for sharing.
Quick question… what was the original measurements of your mirror? Does this frame hang over the sides at all or is it in line with the ends of the mirror? I’m not sure that even makes sense
Our mirror measurements are the same as the wood frame (to the outer edge) so it is 66" long. Our frame is flush with the mirror sides, although you could definitely custom design yours to go past the ends of the mirror if you have space.