

How to Make a Planter From a 5 Gallon Bucket
The links in this post may be affiliate links. That means that if you click them and make a purchase, this site makes a commission. It will have no impact on the price you pay or the experience of your purchase.

I had a set of buckets stacked in the corner of the garage. I used three to try out my 5 gallon bucket planter idea and I am thrilled with how they turned out!
I’m finally getting around to gardening this year. A few strawberries popped up in our raised bed again, and we still have herbs. But I bought two new tomato plants and a pepper plant. This will be our third year growing tomatoes, and every year I learn something new…
I like to grow our tomatoes and peppers in containers so I can move them around to adjust sunlight, etc. While I could have purchased new planters for this project, I prefer to upcycle things when possible (and save a few dollars!)
Scroll down for a list of supplies you’ll need to make your 5-gallon bucket planter with step-by-step directions. I promise these planters are easy to make!!

Below is a supply list for a set of three planters. Feel free to adjust your product list to make more or less planters! Note: this post includes affiliate links, you can read more in my disclosure.

DIY Garden Planter from a 5 Gallon Bucket Supplies
5-gallon buckets (total cost: $8.91, if purchasing)
Outdoor Enamel Spray Paint. (total cost: $8.50)
Fine Sandpaper (I used 400 grit, already owned)
Sisal-Style Rope (total cost $9.72)
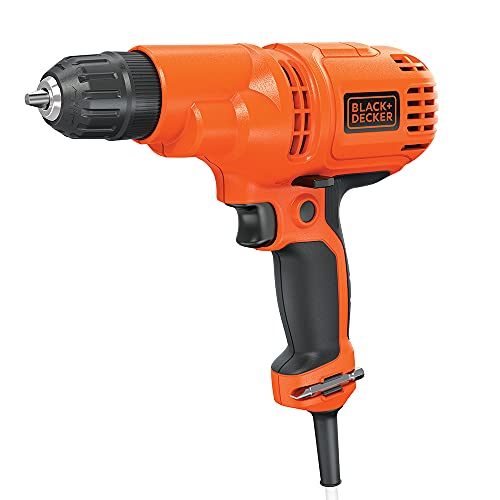
Drill with 1/4″ Drill Bit
Your choice of rocks and high-quality garden soil
-Total project cost for 3 planters: $27.13
-Price per planter: $9.04
Instructions for Making a 5 Gallon Bucket Planter
Step 1
Remove the handles from each bucket by pulling on them until they pop out.

Step 2
Roughen up the bucket surface with fine-grit sandpaper. It’s nothing fancy, rub it down and brush off the dust after. This will help the paint adhere to the plastic bucket.

Step 3
Set your buckets out in a well-ventilated environment, preferably in a spot where you can spray the buckets from all sides.

Step 4
Spray paint each bucket with light coats, according to your spray paint can’s instructions. Don’t worry if the words show through after a coat or two! You will likely need 3 or four light coats for full coverage of the bucket.

Step 5
Allow the paint to dry, and I recommend then flipping over the buckets face up to check for any spots you may have missed. Touch up with spray paint.
*Note: I chose not to spray paint the interior of my buckets because I was concerned with spray paint interacting with gardening plants.

Step 6
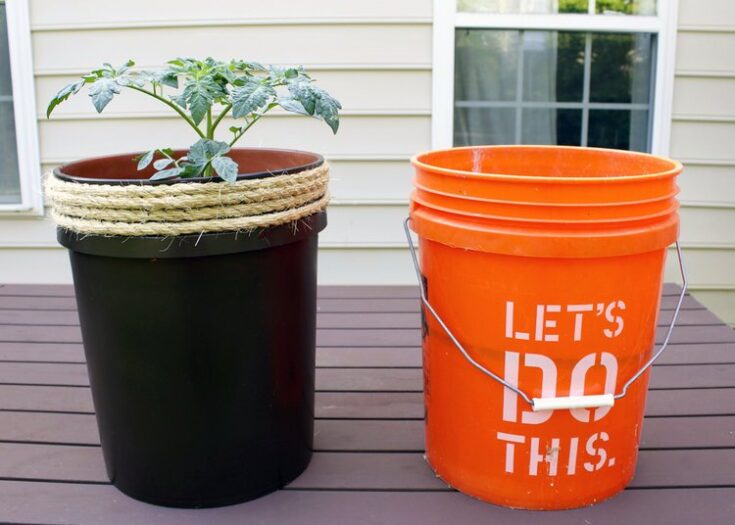
Now for the fun part! Wrap a 12 ft piece of rope around the top diameter of the bucket, just inside the outer lip. You could be fancy and glue the ends to the bucket, but I’m a lazy DIYer and chose to tuck each rope end into itself.
It makes for 1 “ugly side” but 3 pretty sides. And I’m good with that.

Step 7
Drill 1/4″ holes in the bottom of each planter bucket. This will help the soil drain properly.

Step 8
Fill your planter buckets with gravel or lava rock (optional) then gardening soil. Then add your plant! And take a step back to admire the lovely planters you’ve upcycled!


End of Summer Update
We enjoyed our 5-gallon upcycled planters this summer and got a good bit of tomatoes from them! We did add stakes to the pots as the plants grew.
The rope mildewed in the rain–we went with its rustic look. But as an alternative you could try adding nylon, polyester, or polypropylene rope as an alternative to the sisal.

5 Gallon Bucket Planter
Using basic tools and spray paint, learn how to make a planter from affordably priced 5-gallon buckets.
Materials
- Three 5-Gallon Buckets
- 2 Cans of Outdoor Enamel Spray Paint
- Fine Sandpaper (I used 400 grit)
- 36 ft of Sisal-Style Rope, cut into three 12 ft pieces
- Your choice of rocks and high quality garden soil
Tools
- Drill with 1/4″ Drill Bit
Instructions
1. Remove the handles from each 5-gallon bucket by pulling on them until they pop out.
2. Roughen up the bucket surface with fine-grit sandpaper. Nothing fancy, just rub it down and brush off the dust afterward. This will help the paint adhere to the plastic bucket.
3. Set your buckets out in a well-ventilated environment, preferably in a spot where you can spray the buckets from all sides.
4. Spray paint each bucket with light coats, according to your spray paint can’s instructions. Don’t worry if the words show through after a coat or two! You will likely need 3 or four light coats for full coverage of the bucket.
5. Allow the paint to dry, and I recommend then flipping over the buckets face up to check for any spots you may have missed. Touch up with spray paint.
6. Wrap a 12 ft piece of rope around the top diameter of the bucket, just inside the outer lip. You could be fancy and glue the ends to the bucket, but I’m a lazy DIYer and chose to tuck each rope end into itself. It makes for 1 “ugly side” but 3 pretty sides.
7. Drill 1/4″ holes in the bottom of each planter bucket. This will help the soil drain properly.
8. Fill your planter buckets with gravel or lava rock (optional) then gardening soil. Then add your plant!
Notes
I chose not to spray paint the interior of my buckets because I was concerned with spray paint interacting with gardening plants.
Recommended Products
As an Amazon Associate and member of other affiliate programs, I earn from qualifying purchases.


For More Home & Garden Ideas Here


how did you stake the tomatoes and what did you stake them with.