Master Bathroom Update on a $300 Budget
The links in this post may be affiliate links. That means that if you click them and make a purchase, this site makes a commission. It will have no impact on the price you pay or the experience of your purchase.
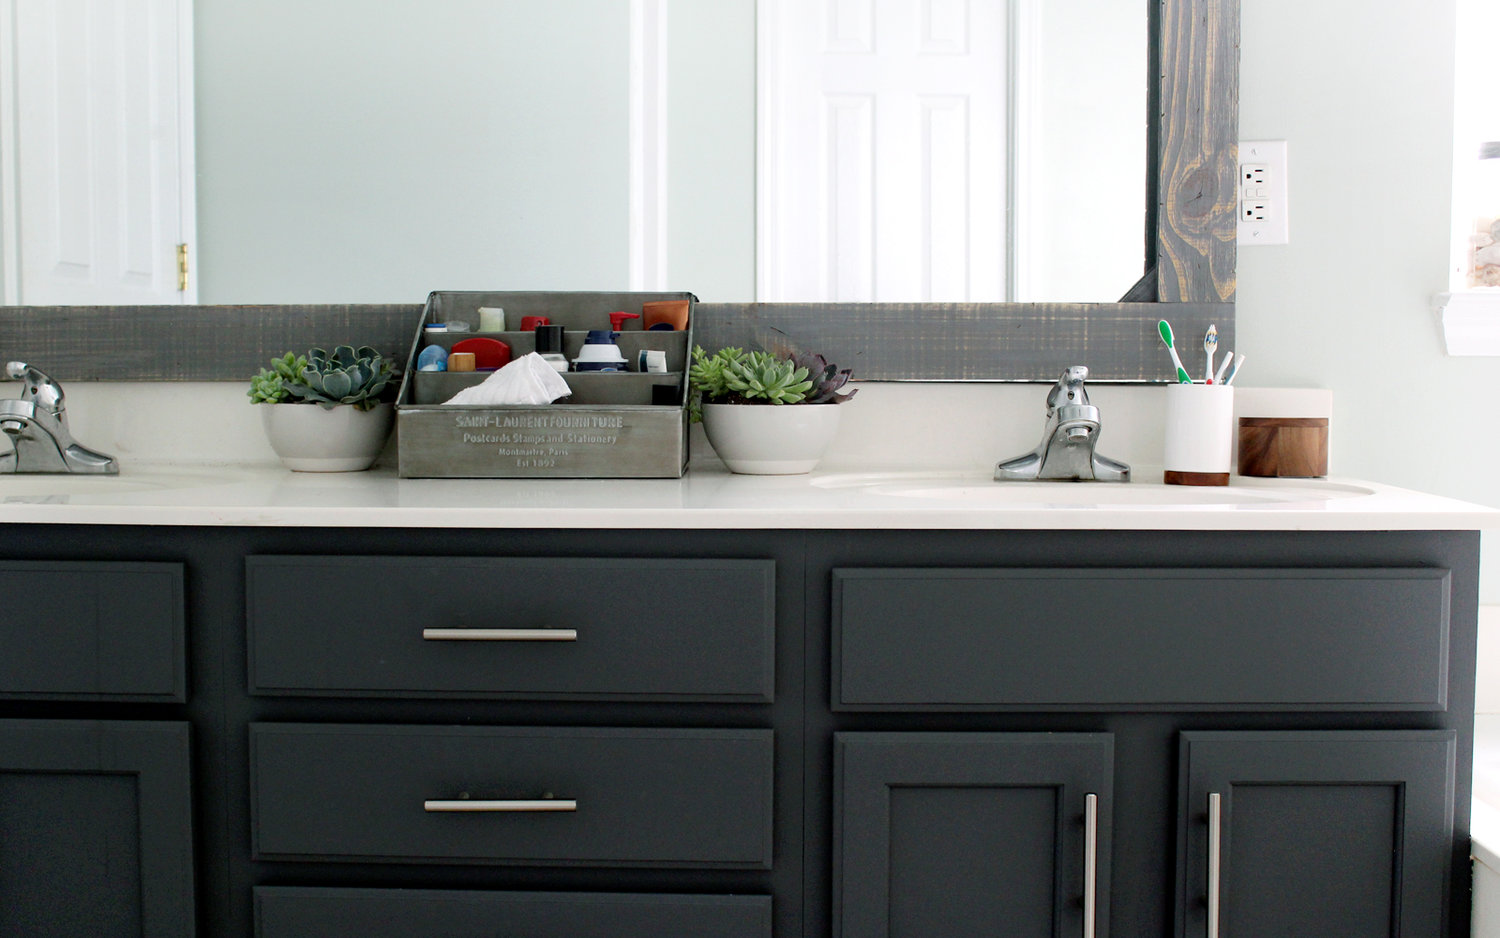
We are working to bring our home out of 1997. We ALWAYS work on a tight budget, and we just updated our master bathroom for $300! The biggest challenge to updating a bathroom on a budget is deciding what to keep and what to update.
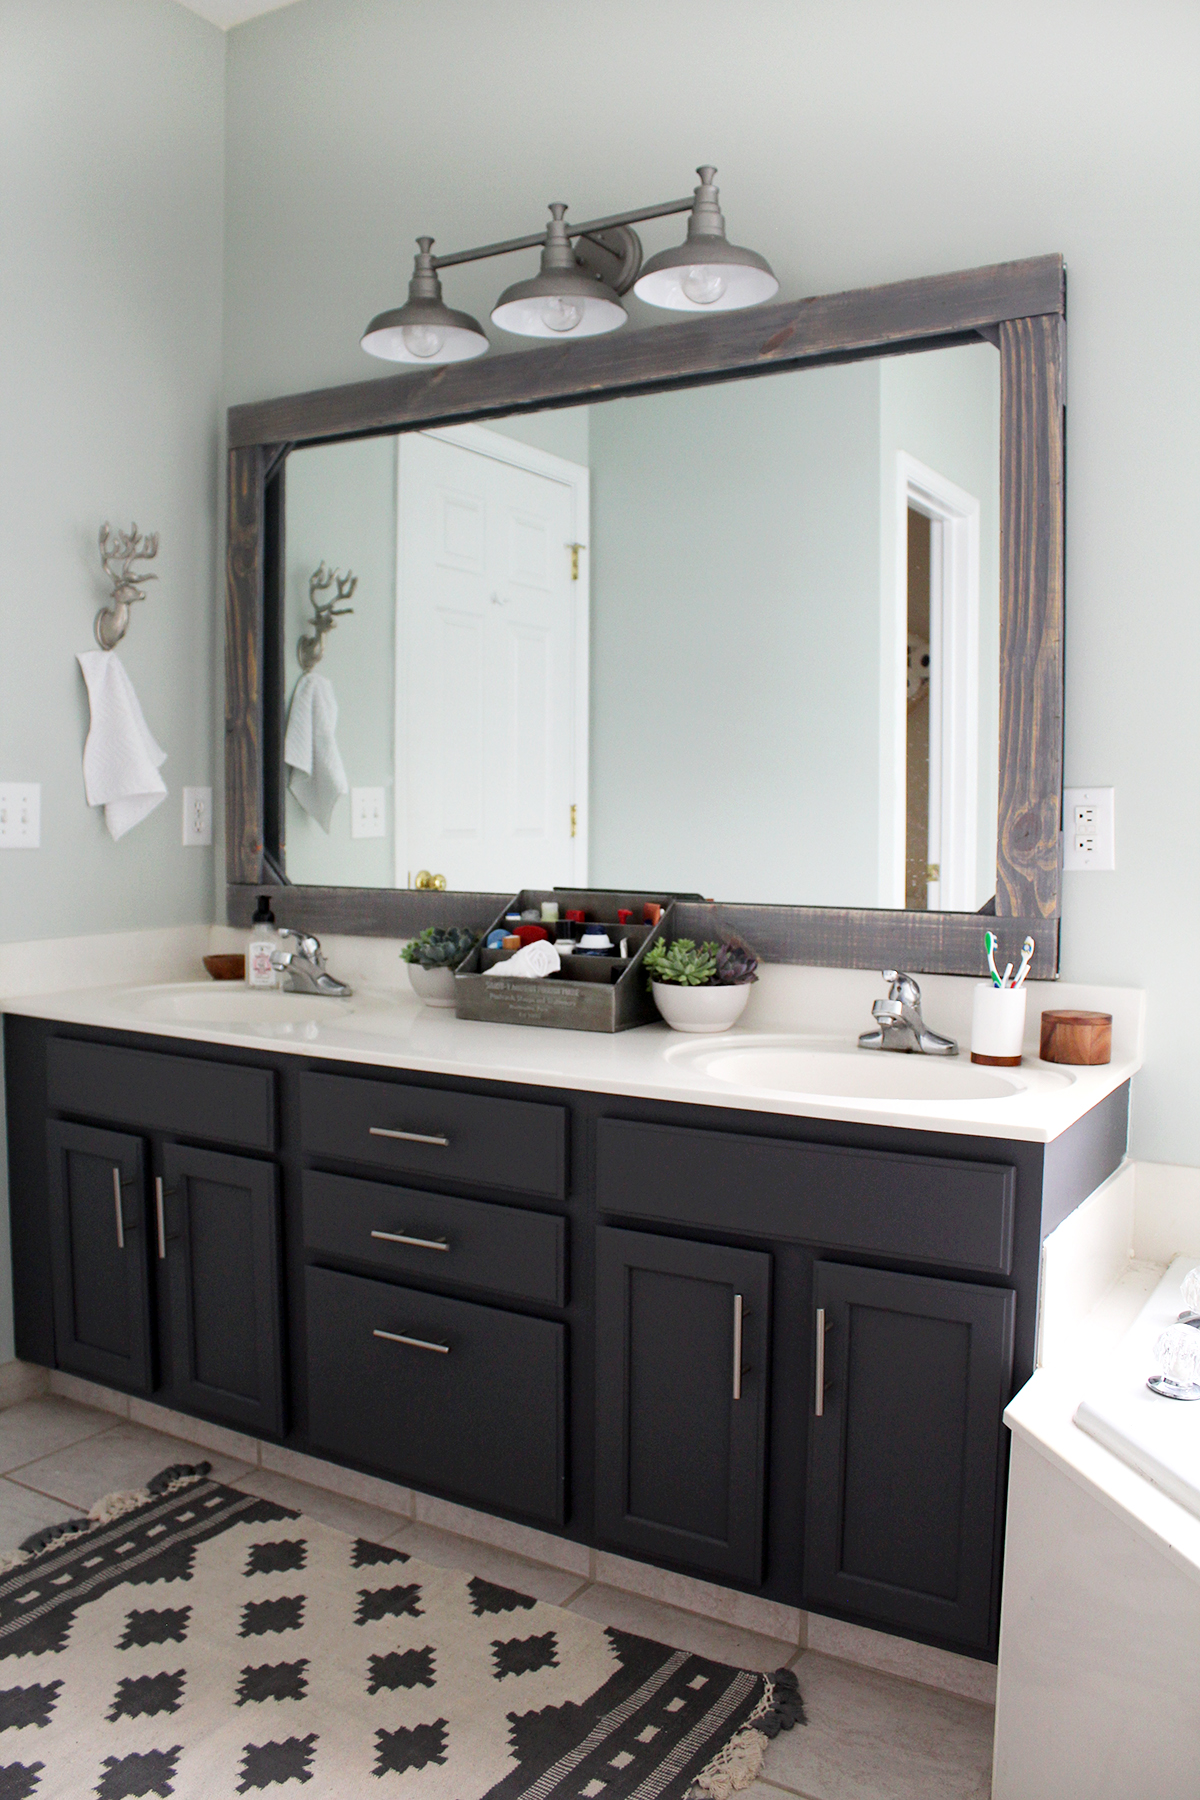
In our master bathroom we kept the original tile flooring, tub, vanity cabinet, and faucets and updated the room with paint, new hardware, a mirror frame, and a new light fixture.
Scroll down to learn more about how we updated our master bathroom on a budget, along with 3 tips for staging your bathroom.

This article contains affiliate links, please read my full disclosure here.
A Dark Grey Painted Vanity
Our vanity countertop looked yellow/beige, so we painted our vanity cabinet a strong, dark grey–Sherwin-Williams Peppercorn (leftover paint from our dining room). The new dark grey on the cabinets contrasts with our original countertops, and now our countertops appear more white/neutral!

Sea Salt Wall Color
I wanted a soft, ocean-inspired color on the walls to give the space a tranquil feeling. After researching our options, I painted over our beige walls with the color Sherwin-Williams Sea Salt.

A New, Affordable Light Fixture
Replacing the original brass bar light with this $60 Galvanized Steel Bathroom Vanity Light made a huge difference in updating the bathroom.
DIY Mirror Frame
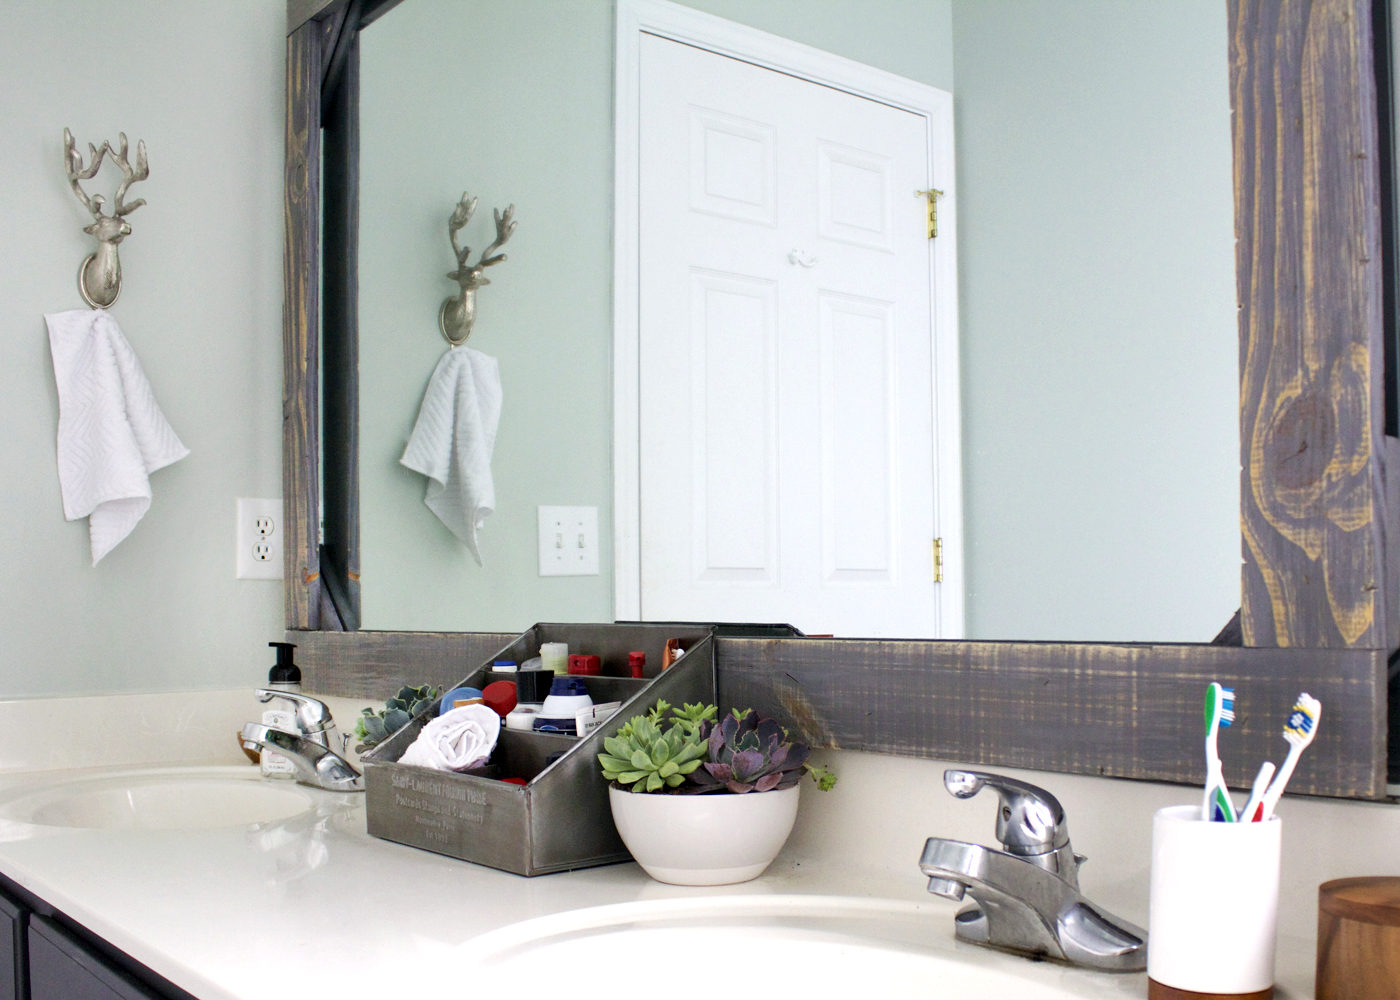
Adding a wood mirror frame to the large mirror gave the room much needed rustic character (and prevents the dark grey vanity cabinet from feeling too modern).

Chrome Accessories Match the Original Faucets
To save money, instead of replacing the original faucets I matched the chrome to our new cabinet handles, light fixture, and towel hook.

3 tips for staging your bathroom
When you update your bathroom here are a few tips for purchasing supplies:
1. Don’t just shop the bathroom sections. I found our countertop organizer in the office supply section of World Market. The wood charger holding our candles came from the kitchen supply section. And I used a rug instead of a bath mat.
2. Take photos with your phone before you go. Snap a few pictures of the room with your smart phone before you head to the store. It will help you recall colors and scale, and overall what you want to accomplish in your space!
3. Add a little greenery. I threw some fresh succulents into cereal bowls on our countertop. Plants add texture and color to a space, just remember to give them the light + water they need! If you are worried you can’t keep up with live plants, there are many attractive faux succulent options.


How We Spent $300 in the Master Bathroom
Supplies
-Cabinet Paint + Primer (free: leftover from other projects), Sherwin Williams Peppercorn
–Galvanized Steel Bathroom Vanity Light
-Wall Paint + Brushes ($65), Sherwin Williams Sea Salt
-3″ Chrome Bar Pulls, similar here ($35)
-Mirror Frame + Hardware ($30)–framed mirror blog post here!
-Quart of Oil Stain for Mirror Frame ($20)
Decor
-Metal St. Laurent Desk Organizer ($40)
-Stag Metal Towel Hook from Homegoods ($8)
-Set of 3 Pillar Candles ($25)
-Wall Frame+Photo (owned/repurposed)
–Wooden Bark Charger ($20)
Total: $297
A glimpse of our DIY process
We removed the oak cabinet doors, sanded, primed and painted using this process. Then we replaced the dated bar light fixture. My husband Lee made a wood frame for the mirror (read the tutorial for the framed mirror here!) and I said goodbye to beige with a fresh coat of Sea Salt paint.


After months of having our master bathroom in pieces (DIY projects have a way of taking longer than you expect). I am thrilled to have our master bathroom back together with a lot of added character. The 1990s oak is completely gone from the room and it feels much more modern.
How have you updated your bathrooms on a budget?





Looks great!! Very well done.
Thanks so much Kelley!
Awesome job, what an update for $300!!
Thanks Brittany! Getting rid of the beige in there was huge!
So you guys never painter the inside of the cabinets? I have the same color cabinets in the before picture.
Good question! We didn’t paint the inside, and it hasn’t bothered me since they are almost always closed.
How did you lighten up the counter?
Its a visual trick, by changing the beige wall color and brown cabinets the countertop looks lighter. But its the same color!
Beautiful! What cabinet paint do you use?
thanks! For these cabinets I used leftover paint. But typically I recommend a latex (water-based) bonding primer and a latex (water-based) enamel paint. That’s what I used here: http://www.tagandtibby.com/blog/2016/4/23/bold-oak-bathroom-cabinet-makeover
Julia did you have to sand the cabinets before priming?
we did! I’d recommend using a mouse style detail sander with 80 and 120 grit. (I wrote this tutorial for ehow last year and it explains it pretty well!) http://www.ehow.com/how_2194667_paint-bathroom-vanity-cabinet.html
OMG! my bathroom looks like your before pics. My house was also built in 1997…I spent too much money for new cabinets when I could have painted… tackling the guest bathroom using your tips.
Awesome!! I need to finish our guest bathroom too. We painted the cabinets in that one but need to swap the light fixture.
Can you tell me where to rug is from?
The rug is from Homegoods (rug section not bath).
I love this. We bought a 1998 home 2 yrs ago and unfortunatly $300 wont do it. Laminate crappy, white cabinets and ugly light mint green counters with double shell sinks. Screaming "bad taste!" Plans to change quick always get deterred by life of coarse. Its a huge bathroom that these people just had unbelievably bad taste doing. When I tackle it I need a creative person like you to cut corners in cost everywhere we can. 😀
Completely understand! If you have Restores in your area, they sometimes sell new bathroom vanities at a big discount! IKEA has reasonable ones too (if you like modern).
Concreting sinks is a money saver. I did it at my last house and I just moved and planto do it again. It was awesome!!
Love that paint color! I want to do the same to my bathroom cabinets. Can you advise the sheen & base type that you used on that Sherwin Williams Emerald paint?
Is the leftover cabinet color a satin, semi-gloss, or eggshell finish?
I just double checked– its a matte finish (Emerald Sherwin Williams)
How is the frame attached to mirror or wall?
Hi! I wrote a tutorial for the mirror here: http://www.tagandtibby.com/blog/2017/2/10/diy-rustic-wood-mirror-frame hope that helps!
How do you like the transition of colors from your bath to your bedroom suite? Also I really love the cabinet color and sea salt combo!! Great update. We have a similar blah oak cabinet and I’m thinking Inreally like what you did!!!
I’m happy with it! Our master bedroom is a medium gray (SW Dovetail Gray) so its all pretty neutral and flows nicely! Thanks!
I love this. I actually plan to do that same thing with the mirror in one of my bathrooms. I have to turn a single vanity into a double
What’s under the bar light and how do you safely remove the mirror.
I have the same configuration of bar light and wall mirror.
Plus I have wall paper and a wall paper border on the ceiling.
We did have to fill in a few holes after removing the bar light, but it was minor. The mirror wasn’t removed, we added a frame over it (you can read more on that here: http://www.tagandtibby.com/blog/2017/2/10/diy-rustic-wood-mirror-frame) Hope that helps!
Love the bathroom. I am remodeling a bathroom with a corner tub. Can you provide a photo of the other wall next to the tub? That would be very helpful. Thank you! Sea salt is a great color!
What brand and color paint did you use on the walls? Thanks.
Sherwin Williams Sea Salt
I would love to know the name of the color paint you used and who sells it…thanks!
Hi! Our walls are Sherwin Williams Sea Salt, cabinets are Sherwin Williams Peppercorn.
How was the counter re finished and if it was painted, does it withstand use?
We didn’t change the countertop or sinks. The dark paint on the cabinets makes the countertops look lighter.
Wow! This looks fantastic. It’s amazing how creativity can outweigh money. Many of us could spend 10 times that and not compare to the beautiful results you have achieved. Kudos
Where did you get cabinet pulls from and how much did they cost ?
Hi Julia….
Great design!!!!
I have a very similar bathroom layout with a corner whirlpool tub. I built the house in the mid-90’s so the whirlpool tub, toilet and shower surround are mauve or dusty rose!!! Very dated. The whirlpool still works so replacing it seems foolish and a waste of money. Do you know if there’s a way to paint fiberglass tubs? I would want a fool proof system so it won’t chip or wear off even if I have to call in a pro. Any advise.
Thanks…..
Arch Lou
Hi! There are kits to refinish tubs like this one http://amzn.to/2rvx9pW (affl. link) but I personally haven’t tried it! Good luck! Our house is mid 90s too, most of our original fixtures are feeling a little dated at this point 🙂
I used Rustoleum epoxy tub and tile refinisher on my tub (cast iron) and it worked beautifully. Don’t see why it wouldn’t work on fiberglass but you could call them to find out. Down side is the fumes are awful! I used a high-quality respirator mask with carbon filters. Had it professionally done three times before. Each time lasted about 5 years. Last time they did terrible job, this was better.
Beautiful. I especially love the mirror frame. Would never have thought of that. Thanks for the inspiration!
Where did you purchase the rig from?
Rug***
Hi! The rug was purchased at Homegoods.
What light bulbs did you use? I just finished installing this light in our bathroom(which is very similar to yours) and it’s very dark!! Worried this light won’t work for us, but I love your makeover and want it to work for our outdated bathroom.
We currently have three 60 watt bulbs installed. We also have a recessed light in the room which helps in the evening. I that helps and your fixture works in the space!
Very cool choice. For $300 it seems that a bathroom can really be renovated to a decent extent. I wonder how much it will cost to renovate using the same materials & Canadian dollars here in Toronto.
I love all of these ideas….my problem is that I have a older marbled counter top….how do I update it?
They make countertop paint kits, I haven’t personally used them but they have solid reviews. I’ll post a link for reference: http://amzn.to/2fTrBox
I am doing a very similar project and want to use the Peppercorn cabinet color. I have aged bronze faucets. Is there any color handles you would recommend for the cabinets?
If you’d like to match your bronze faucets I think bronze handles on dark grey cabinets could be really pretty.
I love this update! I would have never guessed had I not seen the before pics what you kept and what was new!
Thank you!! Changing up the colors helped so much.
Looks beautiful! We are doing a very similar remodel. The vanity light – do you have enough light over the sinks with just the 3-light bar now? We have no other light fixtures in the room so just wondering if it works. I would think it would since the light will reflect off the mirror but wanted to ask before we do it 🙂
We are using three 60 watt bulbs in ours, but it takes up to 100 watts in each. We do have recessed lighting over the tub that helps some but is more dim than our main vanity light. Hope that helps!
I read through all of the comments but I don’t think you mentioned what the counter top material is. My daughter wants her bathroom to look exactly like yours. Nice job.
Thank you! The vanity countertop is original (we didn’t replace) but painting the walls and cabinets & walls (removing yellow-tones from the room) makes the countertops look more white. Home improvement stores do sell countertop paint kits if you want to change the color of your vanity. Hope that helps!
Can I ask… what is the length of your vanity? We will be remodeling a bathroom soon and are trying to decide if we have enough room for double sinks.
Thanks, Dawn
Hi! The length of our vanity is about 74” long. Hope that helps!
Where did you get the Aztec rug?
I found it at Homegoods last year.
I am re-doing my bathroom at the moment and in the next week I will be moving on to painting the cabinets,,,, I have seen a lot of sites and blogs suggesting to use an oil based paint.. and others like you saying to use a water based one… what is the difference?
Thanks for your help (I’m going to be making a mirror frame like yours!)
Oil based is historically a stronger/more durable paint, but it takes much longer to dry. If you go with a water based look for a water-based enamel, it will give you a hard finish. Hope that helps!
Hi there! I love what you did with your bathroom!
My bathroom looks very similar to your before photo. I recently painted my bathroom cabinets black to make it more modern. Though after painting, the cabinets have a very sticky feel to the touch. You said you used the Sherwin William’s in peppercorn. What exact type of paint did you use in that color? Did you use some sort of sealer on the cabinets?
Thanks so much for the inspiration!
Thank you! We actually used leftover paint from another project, so it wasn’t a typical cabinet paint. But they have held up well. Typically with other cabinets I have painted–I use a bonding primer first, then a water-based enamel over that. I didn’t use a sealer. Hope that helps!
We got our cabinets painted and he used a latex based paint. I’m noticing if water gets on or sits on cabinets (got kitchen and bathroom painted) it penetrates the paint and has pulled paint in some areas. Do you have any advice re: this? Thanks in advance!
Sorry to hear you are having problems! I typically use a bonding primer then an enamel water-based paint. We haven’t had that problem yet. I suppose you could touch up occasionally, though I know that isn’t ideal!
I am going to up-date one bathroom. The cream/beige tile are in very good condition and can’t spend to change them – they are on the floor and bathtub area.The bathtub and toilet are in the same beige color. What color would you use for the vanity, countertop, walls and toilet? I am thinking on black vanity and mirror frame, and white walls, countertop and toilet. Thanks!
I would use a color with some blue or cool gray to tone down the beige. They do make a paint kit for tubs & tile (made by Rust-Oleum) if you want to change the beige color, but I personally have not tried the product before. Hope this helps! -Julia
I am finally making over or large master bath. We have yellow granite with specks of gray and white. I am painting the cabinets with dark gray rustoleum paint while putting new chrome knobs. Ours looks almost like your old sink area did with those ugly old ball lights. Our soaker tub has yellowed so I am redoing it white but the chrome faucets in the tub are in great shape so I will just change out the two sinks with chrome too. I need help in determining what type of flooring I should use over wood laminate. My husband says we have to tear it up, I say we can put tile over it but he’s concerned the toilet won’t go back in its place if its raised up higher. Cant afford to rip up floors and of course, possibly another can of worms 🙂 I thought maybe I can find a good peal and stick that will match the gray, yellow and white color scheme with a hint of blues. Any thoughts?
Is the wood laminate in bad condition, or is there any possibility of sanding and painting it white? I could see that looking nice! I also like the idea of peel & stick flooring over the existing flooring, it would be affordable and give you another few years to decide on a more permanent flooring.
So funny- I’m browsing Pinterest trying to get ideas on what to do with my bathroom vanity. Your bathroom walls are the exact same color as mine and your layout (with the huge corner tub) is exactly mine too. So I guess it’s safe to say your vanity might be my inspiration! Thank you!
So glad it helps!! We painted our vanity a few years ago and it still looks great. Love that it doesn’t have a 1990s look anymore.
What color is your shower tile? I want to refresh our bathrooms too but the tile is beige/brown
I am honestly not sure! Our shower is an insert style original to the house. Our floor tile is a light beige.
I love the picture over your tub! Is that a print from Charleston? Did you take the picture or did you purchase?
Thank you! I took the photo on one of our trips to Charleston and had it printed.
I love your rug. Where did you happen to get it from?
Thank you! Its been a few years, but I think I purchased it from Homegoods.
What finish did you use on the cabinets?
I used a leftover paint from our dining room, so it was not an enamel/cabinet paint. It was SW Peppercorn (Emerald line)
Wonderful transformation! We are going to update our 90s bathroom in the exact same way, thanks to your tips. My question is – if our floor tile is a ivory/beigy color, do we need to do the bathroom trim in ivory? Or can we do a true white trim? What did you do? If you do a true white for the trim, will it take away from the trick that you’ve done to make the counter appear "whiter" by painting the cabinets?
I’d look into an off white like Alabaster for the trim. It won’t look beige, but won’t look like a bright/cool white either.